Installing OpenBMP on a Standalone Ubuntu VM
Installing OpenBMP on a Standalone Ubuntu VM


BMP (BGP Monitoring Protocol) is a protocol that can be used to monitor BGP sessions. It enables network operators to have a view into network devices' BGP RIBs (Routing Information Base) as well as protocol updates received by BGP peers. Specifically, BMP provides a continuous view into Adj-RIB-In, which stores the routing information received from various peers. Prior to the introduction of BMP, this type of telemetry could only be obtained programmatically via screen-scraping. For more in-depth information, the BMP protocol definition is outlined in more detail in draft-ietf-grow-bmp-17.
OpenBMP is an open source BGP monitoring system, capable of receiving BMP messages and statistics from BMP-enabled routers and switches, offering users a wealth of information into the status and behaviour of various monitored BGP sessions.
This blog post captures my notes on how to install OpenBMP on a single VM running Ubuntu 20.04.6 LTS and equipped with 8 vCPUs, 32 GB RAM and 200 GB disk space.
The high-level steps to install OpenBMP are as follows:
- Install
dockeranddocker-compose - Download
docker-compose.ymlandobmp-grafana - Setup persistent storage
- Copy Grafana
dashboardsandprovisioningfolders toOBMP_DATA_ROOT - OPTIONAL: Customize
docker-compose.ymlsettings - Run
docker-compose.yml - Verify OBMP containers are running
- Configure BMP on the router and verify messages are coming to OpenBMP
Step 1: Install docker and docker-compose
The first step is to install docker and docker-compose on the VM. Before doing this, we first need to update the package index files on the system using apt-get update. Once complete, proceed with installation by issuing the following command: sudo apt install docker.io docker-compose -y. A truncated output for this installation is shown in the snippet below.
jag_channa@jag-dev:~$ sudo apt install docker.io docker-compose -y
Reading package lists... Done
Building dependency tree
Reading state information... Done
The following additional packages will be installed:
  python3-cached-property python3-docker python3-dockerpty python3-docopt python3-texttable python3-websocket
The following NEW packages will be installed:
  docker-compose python3-cached-property python3-docker python3-dockerpty python3-docopt python3-texttable python3-websocket
The following packages will be upgraded:
  docker.io
1 upgraded, 7 newly installed, 0 to remove and 47 not upgraded.
Need to get 26.7 MB of archives.
...
Setting up python3-cached-property (1.5.1-4) ...
Setting up python3-texttable (1.6.2-2) ...
Setting up python3-docopt (0.6.2-2.2ubuntu1) ...
Setting up docker.io (24.0.5-0ubuntu1~20.04.1) ...
Setting up python3-websocket (0.53.0-2ubuntu1) ...
update-alternatives: using /usr/bin/python3-wsdump to provide /usr/bin/wsdump (wsdump) in auto mode
Setting up python3-dockerpty (0.4.1-2) ...
Setting up python3-docker (4.1.0-1) ...
Setting up docker-compose (1.25.0-1) ...
Processing triggers for man-db (2.9.1-1) ...
jag_channa@jag-dev:~$
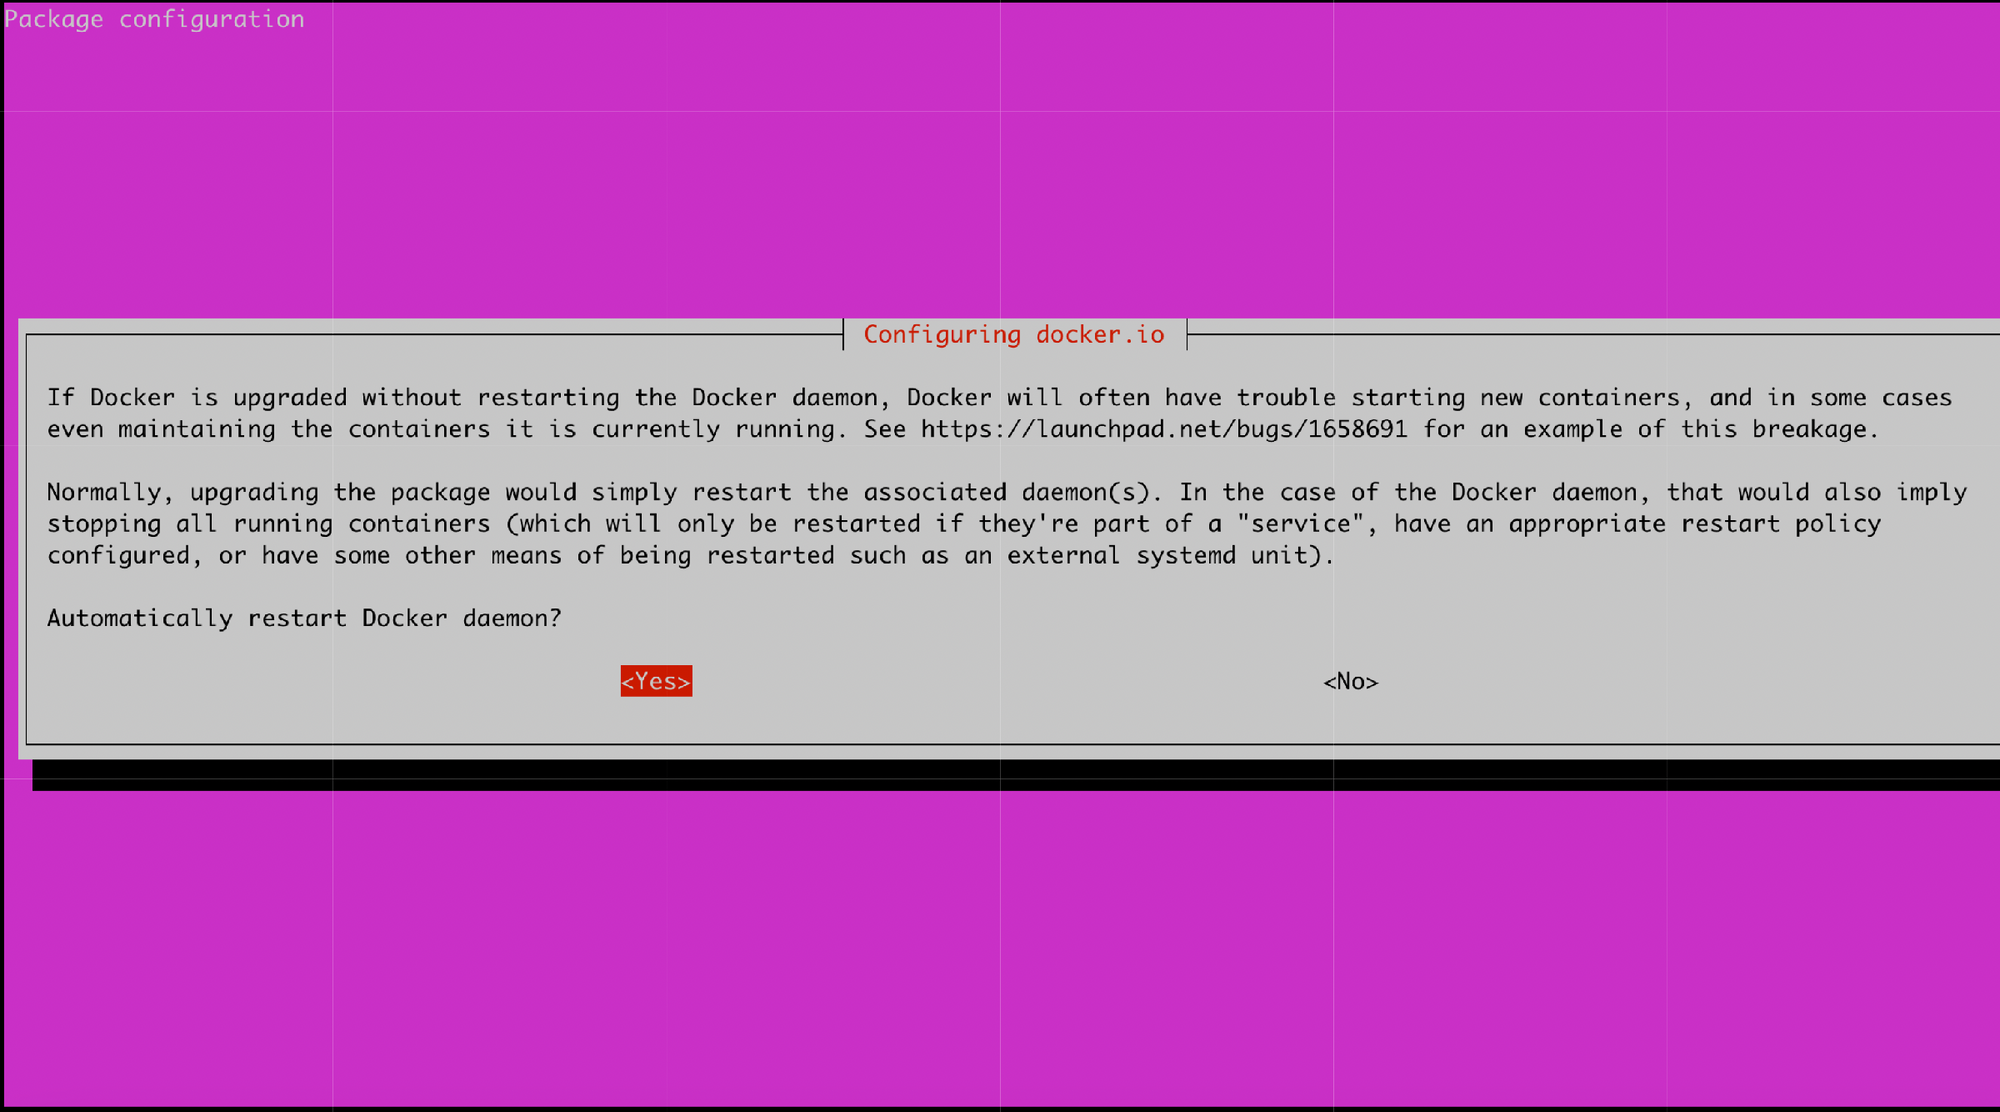
NOTE: When installing docker, you might see the screen below, which prompts the user to select whether the Docker daemon should be automatically restarted. In my case I selected "Yes" to the prompt and continued with the installation.
Step 2: Download docker-compose.yml and obmp-grafana
The next step is to download a couple of items needed to kickstart the installation:
- The OpenBMP
docker-compose.ymlfile obmp-grafanafor visualizing the BGP data and statistics
The docker-compose.yml file can be downloaded by issuing the following command:
wget https://raw.githubusercontent.com/OpenBMP/obmp-docker/main/docker-compose.yml
A sample output from executing this command is shown in the snippet below:
jag_channa@jag-dev:~/openbmp$ wget https://raw.githubusercontent.com/OpenBMP/obmp-docker/main/docker-compose.yml
--2023-09-20 01:53:26--  https://raw.githubusercontent.com/OpenBMP/obmp-docker/main/docker-compose.yml
Resolving raw.githubusercontent.com (raw.githubusercontent.com)... 185.199.111.133, 185.199.110.133, 185.199.109.133, ...
Connecting to raw.githubusercontent.com (raw.githubusercontent.com)|185.199.111.133|:443... connected.
HTTP request sent, awaiting response... 200 OK
Length: 7831 (7.6K) [text/plain]
Saving to: ‘docker-compose.yml’

docker-compose.yml                  100%[==================================================================>]   7.65K  --.-KB/s    in 0s

2023-09-20 01:53:27 (62.9 MB/s) - ‘docker-compose.yml’ saved [7831/7831]

jag_channa@jag-dev:~/openbmp$
As for obmp-grafana, it can be downloaded by issuing the git clone command as shown below:https://github.com/OpenBMP/obmp-grafana.git
jag_channa@jag-dev:~/openbmp$ git clone https://github.com/OpenBMP/obmp-grafana.git
Cloning into 'obmp-grafana'...
remote: Enumerating objects: 307, done.
remote: Counting objects: 100% (307/307), done.
remote: Compressing objects: 100% (150/150), done.
remote: Total 307 (delta 170), reused 274 (delta 138), pack-reused 0
Receiving objects: 100% (307/307), 120.22 KiB | 17.17 MiB/s, done.
Resolving deltas: 100% (170/170), done.
jag_channa@jag-dev:~/openbmp$
Step 3: Setup Persistent Storage
According to the OpenBMP installation docs, we can place our persistent storage anywhere, but typically everything is placed under /var/openbmp.
First, we need to create an environment variable, called OBMP_DATA_ROOT, which defines the root location for our persistent data. Issue the following command to create this environment variable: export OBMP_DATA_ROOT=/var/openbmp.
Next, we create the directory defined in OBMP_DATA_ROOT and set permissions for full read, write and execution access using the following commands:
sudo mkdir -p $OBMP_DATA_ROOT
sudo chmod -R 7777 $OBMP_DATA_ROOT
Finally, we also need to create all of the subdirectories for persistent data for Kafka, ZooKeeper, Postgres and Grafana under the same OBMP_DATA_ROOT root directory (and set full read, write and execution access permissions):
mkdir -p ${OBMP_DATA_ROOT}/config
mkdir -p ${OBMP_DATA_ROOT}/kafka-data
mkdir -p ${OBMP_DATA_ROOT}/zk-data
mkdir -p ${OBMP_DATA_ROOT}/zk-log
mkdir -p ${OBMP_DATA_ROOT}/postgres/data
mkdir -p ${OBMP_DATA_ROOT}/postgres/ts
mkdir -p ${OBMP_DATA_ROOT}/grafana

chmod -R 7777 $OBMP_DATA_ROOT/*
Step 4: Copy Grafana dashboards and provisioning Folders to OBMP_DATA_ROOT
In Step 2 above, we downloaded obmp-grafana to the VM. We need to copy the dashboards and provisioning folders from this download over to the ${OBMP_DATA_ROOT}/grafana directory. This can be done using the following command:
cp -r obmp-grafana/dashboards obmp-grafana/provisioning ${OBMP_DATA_ROOT}/grafana/
Step 5: OPTIONAL - Customize docker-compose.yml Settings
The docker-compose.yml file downloaded in Step 2 above contains default values for many installation settings such as usernames, passwords, port numbers, database retention, etc. These settings can optionally be changed as per your particular environment. For this setup, however, I will stick with the default settings.
Step 6: Run docker-compose.yml
Now we are ready to kickstart the installation, by simply running the docker-compose.yml file with the following command:
sudo OBMP_DATA_ROOT=/var/openbmp docker-compose -f ./docker-compose.yml -p obmp up -d
Running the above command will pull in and launch all of the required OBMP containers, which include:
obmp-psqlobmp-psql-appobmp-zookeeperobmp-whoisobmp-grafanaobmp-collectorobmp-kafka
A sample output from running docker-compose.yml is shown in the snippet below:
jag_channa@jag-dev:~/openbmp$ sudo OBMP_DATA_ROOT=/var/openbmp docker-compose -f ./docker-compose.yml -p obmp up -d
Creating network "obmp_default" with the default driver
Pulling zookeeper (confluentinc/cp-zookeeper:7.1.1)...
7.1.1: Pulling from confluentinc/cp-zookeeper
a9e23b64ace0: Pull complete
-----[ CONTENT OMITTED FOR BREVITY ]-----
7da07b608cf4: Pull complete
Digest: sha256:31f5992546679a5c70bf10b2f1b6c9c5c4d8e5bb585a62e637a4b1b872709bbe
Status: Downloaded newer image for confluentinc/cp-zookeeper:7.1.1
Pulling kafka (confluentinc/cp-kafka:7.1.1)...
7.1.1: Pulling from confluentinc/cp-kafka
a9e23b64ace0: Already exists
-----[ CONTENT OMITTED FOR BREVITY ]-----
e2cba4a86a94: Pull complete
Digest: sha256:5f3cdbebbd9efdb805a8af27f904b6ac5ac43a24084700009f8ec0a31ccd46a6
Status: Downloaded newer image for confluentinc/cp-kafka:7.1.1
Pulling grafana (grafana/grafana:9.1.7)...
9.1.7: Pulling from grafana/grafana
9621f1afde84: Pull complete
-----[ CONTENT OMITTED FOR BREVITY ]-----
343f3ed96abe: Pull complete
Digest: sha256:8b81f1225bc450e56cdcaffbfa5a051b891c8332789960e7362c38edba73a123
Status: Downloaded newer image for grafana/grafana:9.1.7
Pulling psql (openbmp/postgres:2.2.1)...
2.2.1: Pulling from openbmp/postgres
b82d2cbbe2a9: Pull complete
Digest: sha256:9b6483a8319f823cd2fa42c9cb9a212514063523246b924648a388aca0f17140
Status: Downloaded newer image for openbmp/postgres:2.2.1
Pulling collector (openbmp/collector:2.2.3)...
2.2.3: Pulling from openbmp/collector
5c556efcf56e: Pull complete
-----[ CONTENT OMITTED FOR BREVITY ]-----
4f4fb700ef54: Pull complete
Digest: sha256:1a59897b142615b8eaa5ae9e6ea4c6535a84b0df9f58726636e137cf158f07af
Status: Downloaded newer image for openbmp/collector:2.2.3
Pulling psql-app (openbmp/psql-app:2.2.2)...
2.2.2: Pulling from openbmp/psql-app
1fe172e4850f: Pull complete
-----[ CONTENT OMITTED FOR BREVITY ]-----
f9f65a319f09: Pull complete
Digest: sha256:fa94347b8097ffc49d33bdc81a82380e9975c424c1840e53d5602fc98e51b67a
Status: Downloaded newer image for openbmp/psql-app:2.2.2
Pulling whois (openbmp/whois:2.2.0)...
2.2.0: Pulling from openbmp/whois
2408cc74d12b: Pull complete
-----[ CONTENT OMITTED FOR BREVITY ]-----
097dea181b87: Pull complete
Digest: sha256:d8c329f7d54a878f89e76f664948b2260ccc9b52a298c7742b858f8d69005082
Status: Downloaded newer image for openbmp/whois:2.2.0
Creating obmp-psql      ... done
Creating obmp-psql-app  ... done
Creating obmp-zookeeper ... done
Creating obmp-whois     ... done
Creating obmp-grafana   ... done
Creating obmp-collector ... done
Creating obmp-kafka     ... done
jag_channa@jag-dev:~/openbmp$
Ideally, the installation should complete without any errors. But errors can potentially occur, especially if there are port conflicts. Let's say, for example, that I had a port conflict whereby I had another application running on the VM which was listening on TCP port 5000 (the same port that obmp-collector listens on). In this case I would have seen an error message like the one shown below, where it explicitly calls out obmp-collector and that it could not be started because "port 5000 is already allocated":
-----[ CONTENT OMITTED FOR BREVITY ]-----
Creating obmp-psql      ... done
Creating obmp-grafana   ... done
Creating obmp-psql-app  ... done
Creating obmp-whois     ... done
Creating obmp-psql      ... done
Creating obmp-grafana   ... done
Creating obmp-psql-app  ... done
Creating obmp-whois     ... done
ERROR: for obmp-collector  Cannot start service collector: driver failed programming external connectivity on endpoint obmp-collector (ebbce298
Creating obmp-zookeeper ... done
Creating obmp-kafka     ... done

ERROR: for collector  Cannot start service collector: driver failed programming external connectivity on endpoint obmp-collector (ebbce2984ddc52c9f1cdad0be73f19e6a05770b025622a53857d509627ffa0d1): Bind for 0.0.0.0:5000 failed: port is already allocated
ERROR: Encountered errors while bringing up the project.
Step 7: Verify OBMP Containers are Running
If the installation ran successfully without errors, then we can verify that all obmp containers are up and running by issuing the docker ps command, as shown below:
jag_channa@jag-dev:~/openbmp$ sudo docker ps --format 'table {{.Names}}\t{{.Image}}\t{{.Status}}' | grep obmp
obmp-kafka           confluentinc/cp-kafka:7.1.1       Up 22 minutes
obmp-collector       openbmp/collector:2.2.3           Up 22 minutes
obmp-whois           openbmp/whois:2.2.0               Up 22 minutes
obmp-grafana         grafana/grafana:9.1.7             Up 22 minutes
obmp-zookeeper       confluentinc/cp-zookeeper:7.1.1   Up 22 minutes
obmp-psql-app        openbmp/psql-app:2.2.2            Up 22 minutes
obmp-psql            openbmp/postgres:2.2.1            Up 22 minutes
jag_channa@jag-dev:~/openbmp$
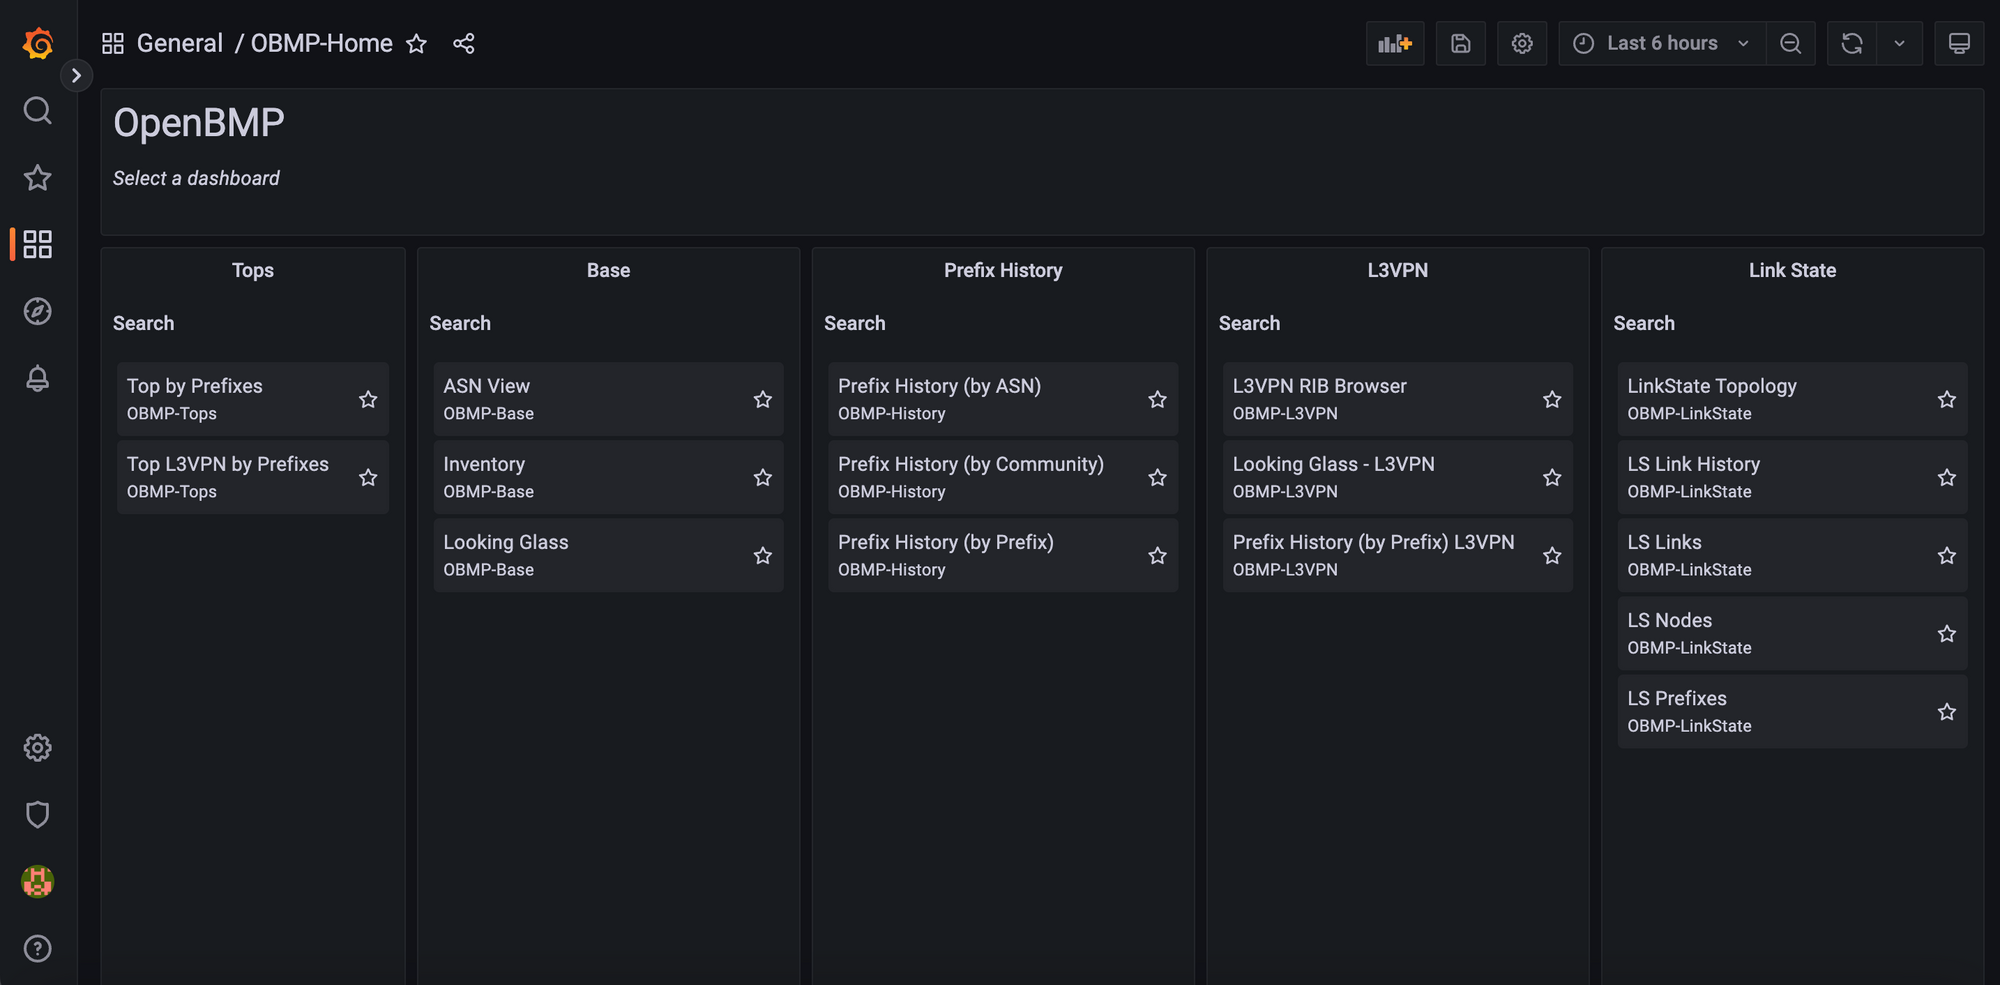
In addition, verify that Grafana is up and running by pointing your browser to http://<YOUR_VM_IP>:3000, which should take you to the following landing page:
Step 8: Configure BMP on Router and Verify Messages are Coming to OpenBMP
As a final end-to-end verification test, we need to configure BMP on a test router and verify that data is actually making its way to OpenBMP.
In my lab setup, I have a Cisco Nexus 9000v switch running NX-OS 9.3(7) in EVE-NG. To configure BMP on a Nexus switch requires the following very simple config which only requires specifying the IP address of OpenBMP (e.g. 10.143.32.3 in my setup) as well as the TCP port it listens on (e.g. 5000):
router bgp 65501
  bmp-server 1
    address 10.143.32.3 port 5000
One very quick way of checking if data is coming in to OpenBMP is to use tcpdump, as shown in the snippet below. Here, I am filtering for any packets arriving on interface ens4 with a destination TCP port of 5000.
root@jag-dev:~# tcpdump -A -ni ens4 dst port 5000

tcpdump: verbose output suppressed, use -v or -vv for full protocol decode
listening on ens4, link-type EN10MB (Ethernet), capture size 262144 bytes

04:50:56.469473 IP 10.143.32.20.39024 > 10.143.32.3.5000: Flags [.], ack 4285494229, win 29, options [nop,nop,TS val 1306866894 ecr 1353979276], length 0
E..4	$..?..l
. .
. ..p.......os.....q......
M.4.P...
Another approach to verifying that data is coming in is to login to the obmp-psql Postgres database and verify that tables are getting populated with information from the configured router. To do this, we first login to the obmp-psql container using sudo docker exec -it obmp-psql bash.
Next, we login to psql (the terminal based frontend to PostgreSQL) by using the following command: psql -U openbmp. The output for these commands are shown in the snippet below:
jag_channa@jag-dev:~/openbmp$ sudo docker exec -it obmp-psql bash
postgres@56e7d826f70a:~$ psql -U openbmp
psql (14.5 (Ubuntu 14.5-1.pgdg22.04+1))
Type "help" for help.

openbmp=#
Once logged into psql, we can get a listing of all 33 tables in the openbmp database by issuing \dt, as shown below:
openbmp=# \dt
                  List of relations
 Schema |           Name           | Type  |  Owner
--------+--------------------------+-------+---------
 public | base_attrs               | table | openbmp
 public | bgp_peers                | table | openbmp
 public | collectors               | table | openbmp
 public | geo_ip                   | table | openbmp
 public | global_ip_rib            | table | openbmp
 public | info_asn                 | table | openbmp
 public | info_route               | table | openbmp
 public | ip_rib                   | table | openbmp
 public | ip_rib_log               | table | openbmp
 public | l3vpn_rib                | table | openbmp
 public | l3vpn_rib_log            | table | openbmp
 public | ls_links                 | table | openbmp
 public | ls_links_log             | table | openbmp
 public | ls_nodes                 | table | openbmp
 public | ls_nodes_log             | table | openbmp
 public | ls_prefixes              | table | openbmp
 public | ls_prefixes_log          | table | openbmp
 public | pdb_exchange_peers       | table | openbmp
 public | peer_event_log           | table | openbmp
 public | routers                  | table | openbmp
 public | rpki_validator           | table | openbmp
 public | spatial_ref_sys          | table | openbmp
 public | stat_reports             | table | openbmp
 public | stats_chg_byasn          | table | openbmp
 public | stats_chg_bypeer         | table | openbmp
 public | stats_chg_byprefix       | table | openbmp
 public | stats_ip_origins         | table | openbmp
 public | stats_l3vpn_chg_bypeer   | table | openbmp
 public | stats_l3vpn_chg_byprefix | table | openbmp
 public | stats_l3vpn_chg_byrd     | table | openbmp
 public | stats_peer_rib           | table | openbmp
 public | stats_peer_update_counts | table | openbmp
 public | users                    | table | openbmp
(33 rows)

openbmp=#
Finally, we can issue a simple query (select * from routers;) against the routers table to see if our newly configured Nexus switch shows up here. As per the snippet below, we do see the switch listed in the table.
openbmp=# select * from routers;
               hash_id                |  name  |  ip_address  | router_as |         timestamp          |                      description                       | state | ispassive | term_reason_code | term_reason_text | term_data | init_data | geo_ip_start |          collector_hash_id           | bgp_id
--------------------------------------+--------+--------------+-----------+----------------------------+--------------------------------------------------------+-------+-----------+------------------+------------------+-----------+-----------+--------------+--------------------------------------+--------
 f18e6d51-ec44-aeee-5b5f-5153e325bcc4 | nexus1 | 10.143.32.20 |           | 2023-09-20 04:14:24.728647 | Nexus9000 C9300v Chassis, Software Version 9.3(7)I9(1) | up    | f         |                0 |                  |           |           | 10.0.0.0/8   | 91e3a7ff-9f56-76ed-6ae6-fcd8a6b455ec |
(1 row)

openbmp=#
"It's alive!"
As a final note, in the event that you wish to uninstall OpenBMP, this can easily be done by running docker-compose.yml using the following command:
sudo OBMP_DATA_ROOT=/var/openbmp docker-compose -f ./docker-compose.yml -p obmp down
A sample output from running the above uninstall command is captured below:
jag_channa@jag-dev:~/openbmp$ sudo OBMP_DATA_ROOT=/var/openbmp docker-compose -f ./docker-compose.yml -p obmp down
Stopping obmp-kafka     ... done
Stopping obmp-zookeeper ... done
Stopping obmp-psql      ... done
Stopping obmp-psql-app  ... done
Stopping obmp-whois     ... done
Stopping obmp-grafana   ... done
Removing obmp-kafka     ... done
Removing obmp-zookeeper ... done
Removing obmp-psql      ... done
Removing obmp-psql-app  ... done
Removing obmp-whois     ... done
Removing obmp-grafana   ... done
Removing obmp-collector ... done
Removing network obmp_default
jag_channa@jag-dev:~/openbmp$
-- Jag --
References:
- Getting Started with OpenBMP: https://www.openbmp.org/getting_started.html
- BGP Monitoring Protocol - draft-ietf-grow-bmp-17:
https://datatracker.ietf.org/doc/html/draft-ietf-grow-bmp-17